


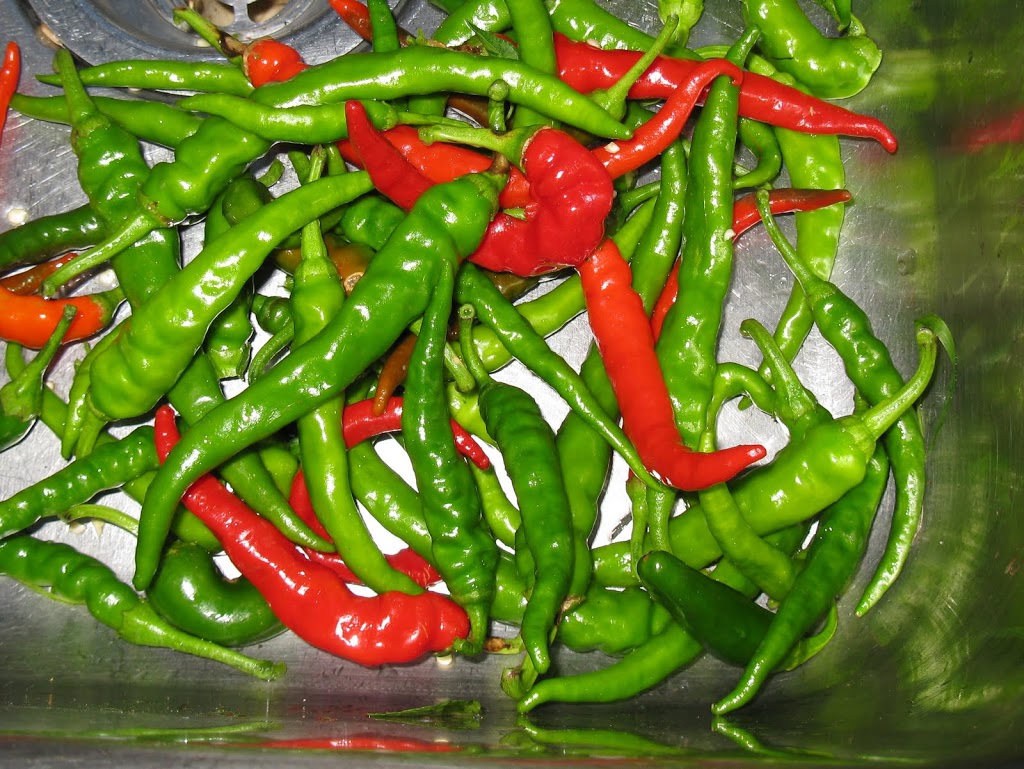
Bumper Pepper Harvest
I wanted to make Pico de Gallo, but all my tomatoes rotted on the vines. So, I decided to pickle the pepper crop instead. Sort through your peppers. Use only the best, most beautiful peppers. Peppers that have mold spots, rots, cracks, and brown areas are just going to get worse in the jars. Use nice ripe peppers!
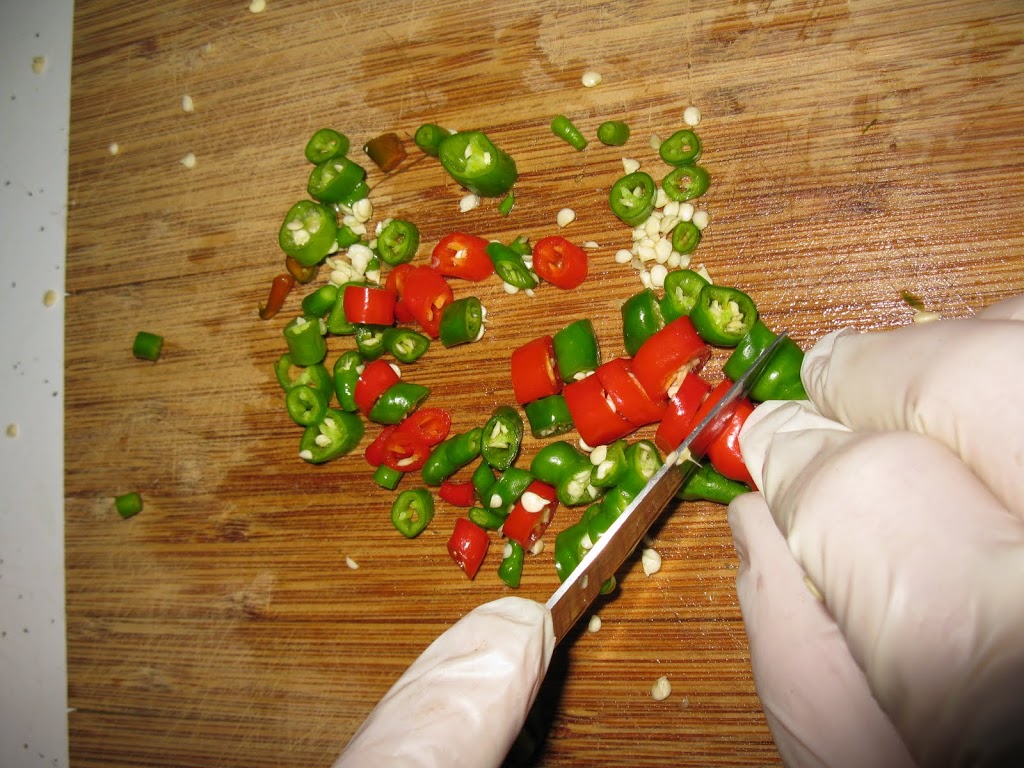
Slice ’em but don’t Touch ’em!
Rinse the garden off the peppers. Wearing gloves, slice the peppers into rings. Don’t touch yourself, your face, your anything. Take them off by turning them inside-out when you’re done and don’t touch the chopped peepers with your bare hands. I kept my pepper varieties separate, but there’s no reason you can’t mix them together.
While you’re chopping peppers, fill your canner with water and clean jars. Get them boiling. You want to make sure your jars are clean AND sterile. Clean means there’s no leftovers in them. Sterile means leaving them in boiling water for 20 minutes.
In a small pot, boil some water. This will be used to preheat the lids. Just before putting the lids on the jars, heat up the seals for 2-3 minutes in the boiling water.

Sterilize the lids and soften the seals
Mix together your pickle. This is my Dad’s ratio of vinegar to water. It’s not too vinegary so it doesn’t overpower you. There’s just enough salt to bring out the flavors in the peppers but this is not a brine. The garlic is optional, but I wouldn’t dream of going without it!
- 1 quarts water
- 1 c vinegar
- 1/4 c non-iodized salt
- 8 cloves garlic (or more) peeled
This is enough for 4 pint jars. Make sure you have enough or extra. Mix this up in a pot and get in boiling.
Using a jar lifter, retrieve the jars from the boiling pot, drain and fill with peppers. Add a couple of garlic cloves to each jar. Leave about 3/4″ “headroom” in each jar. Pour the boiling vinegar solution to within 1/2″ of the top of each jar.
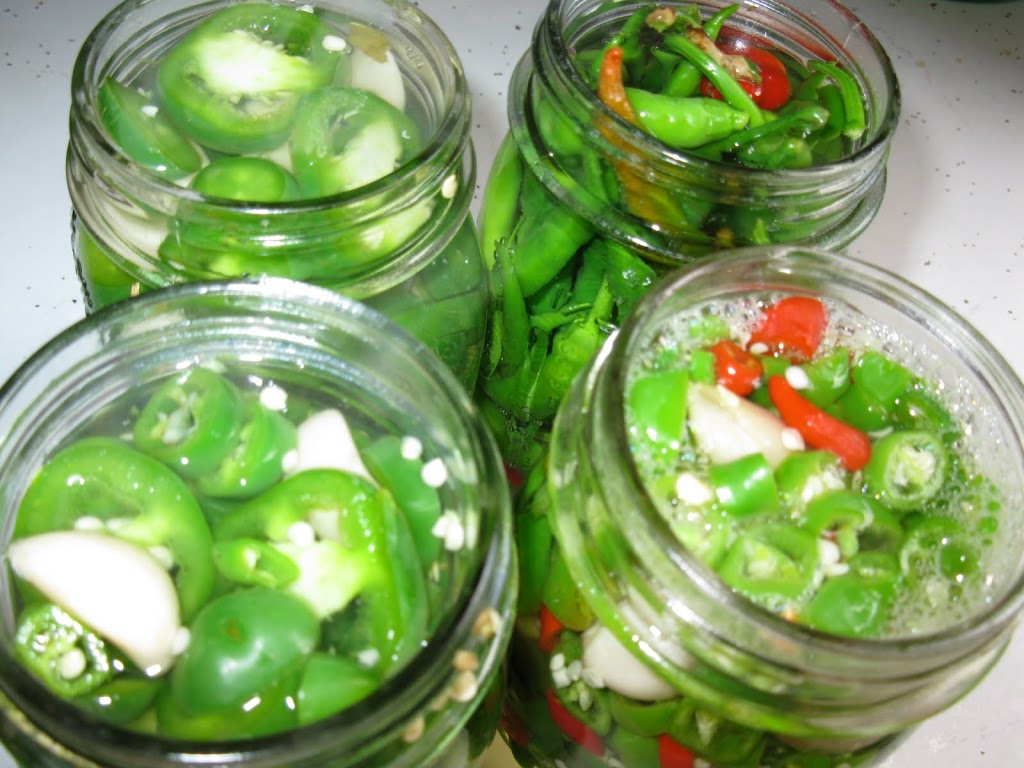
Pack Your Jars
Using a magnet or a fork, carefully get the lids out of the pre-heat pot and put on each jar. Make sure there’s no seeds or anything on the rim that will interfere with the seal. Screw on the rings. Hand tighten. The rings are only used to keep the lids in place while they’re in the the processing pot, boiling. Once the jars “can” or seal, vacuum will hold the lids in place.
Put the jars back in the canner. Maintain a hard boil for 15 minutes if you’re canning pints–25 minutes for quarts. The boiling water should cover the lids by 1 inch.

Hot Process Your Jars
Using a jar lifter, remove the jars from the canner and let rest on a folded towel. Resist the temptation to touch the lids before they seal. As the jars cool, you’ll hear the lids start to pop down.
If they all pop down, you’ve successfully canned peppers. If they don’t pop, keep them in the ‘fridge–they’re not safe to store in a cupboard. The pop noise that the lid makes means that the jars have sealed. If they don’t seal, they’re susceptible to spoilage, but you can just have “Refrigerator Pickled Peppers” and eat them more quickly. If you are successful canning and properly sealing them–they’ll keep nearly forever without refrigeration!
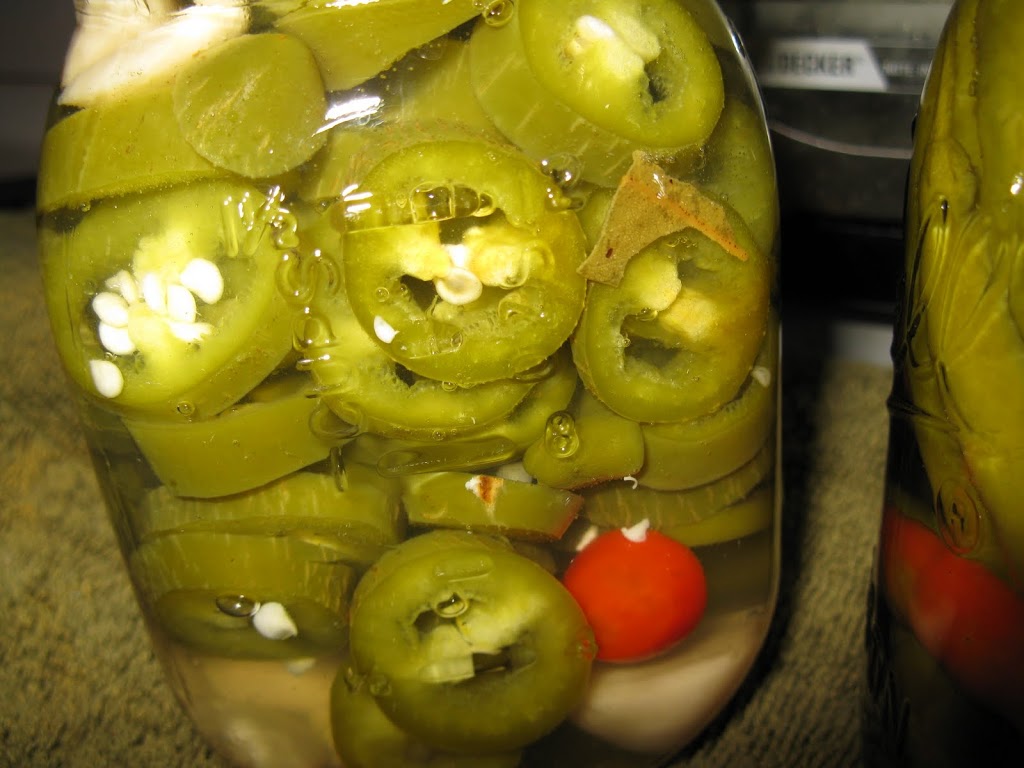
Pickled Peppers ready for storage
Well, maybe not forever, but at least until next summer when there’s more fresh hot peppers to eat!